
If you want an easy, inexpensive way to give your stairwell a quick modern update, consider installing a mixed gallery wall. It may seem tricky since stairwells are not as straightforward as a living room wall for example, but hopefully this tutorial will show you that this isn’t as difficult as it may seem.
For our stairwell gallery wall, we went for a more organic layout instead of a structured, symmetric layout since we are using different types of frames, shapes, textures and wall art pieces. This also allows us to change and switch out pieces easily over time. Also since our staircase is more narrow, we chose smaller photos and frames since they will be viewed up close.
Supplies:
- Frames
- Painter’s Tape
- Pencil
- Roll of kraft (or similar) paper
Tools:
- Drill and/or hammer
- Nails (and nail anchors if you have heavy pieces)
- Level
- Measuring Tape
Instructions
Step 1 – Curate the Gallery Wall
We’d suggest to start this project with a theme or “feel” in mind for your stairwell gallery wall. Whether you would like to match all of your frames, choose mix mediums and wall art, or use all black and white photos, etc, make sure your gallery is following the same theme and the pieces flow together.
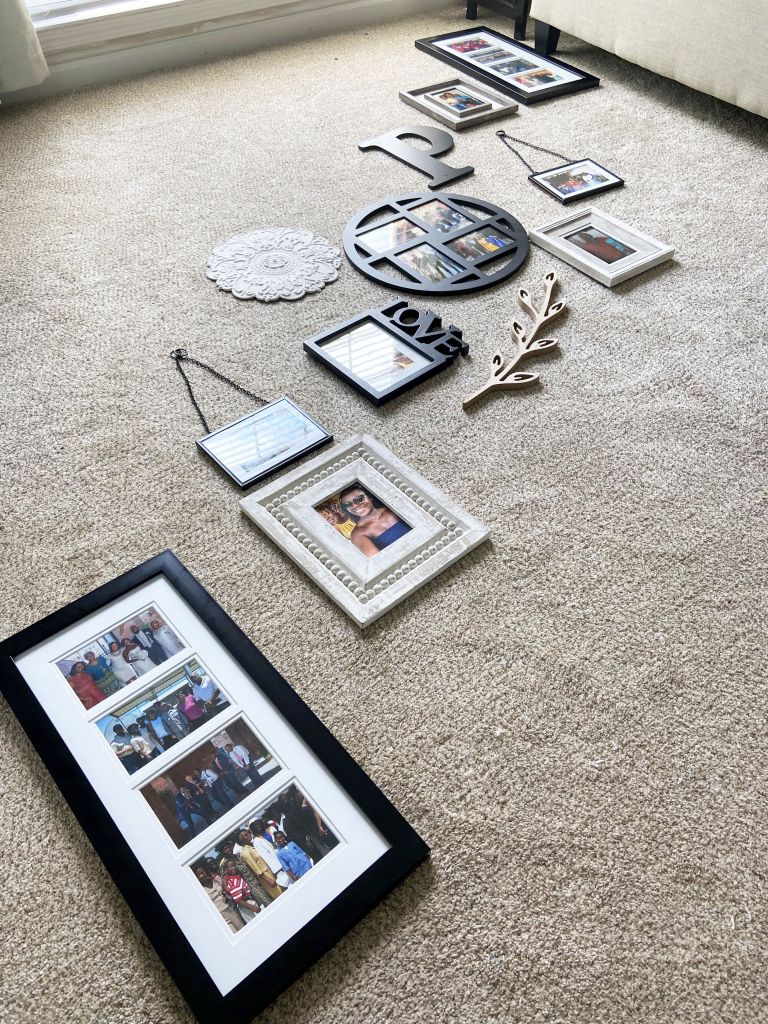
We started by laying all of the pieces on the floor at roughly a 45 degree angle (to mimic the angle of the stairwell. We started by choosing the middle frames first, then working our way out. We also put the larger pieces staggered evenly up the stairwell.
Step 2 – Measure Stairwell Wall
A standard measurement to start each frame or picture from above each step could be about 60 inches. You can mark this with a pencil and/or a piece of painter’s tape. It’s also important to mark the very center of the gallery wall space, so you know where the focal point will be, as well as the beginning and ending point.
Step 3 – Plan with Paper Templates
Cut out paper templates roughly the size of each piece using a kraft paper, or something similiar. If you have a lot of frames, you may want to label the templates so you don’t lose track of what you have. Also be sure to mark where the picture hanging hooks (or sawtooth hanger) are on these templates.

Using painter’s tape, you can arrange the templates on the wall easily to arrange placement for each frame before nailing or drilling holes in the wall.

Step 4 – Hang Pieces on Stairwell
Using the mark you drew for the picture hanging hooks, hammer or drill the nail through the paper. You can then easily tear off the template and hang your piece! You may need a level to ensure the frames are hanging exactly how you’d like.

Hopefully these tips are helpful in designing and creating your own DIY stairwell gallery wall. Let us see your gallery wall by tagging us on Instagram @hammerandhandsaw!


Also if you are looking for another way to give your home a quick refresh, consider replacing those old door hinges (btw: you don’t even have to remove the door!)


